Did you know families can save about $1,200 a year by doing basic home maintenance themselves? That’s because small, ongoing DIY tasks can really help your budget and make you feel good.
This guide is here to boost your confidence in tackling DIY home improvement. It has easy steps for simple DIY projects and repairs. Most homeowners and renters in the U.S. can do them without needing special training.
It teaches you to check problems, get the right tools, and know safety rules. This way, you’ll know when it’s okay to continue or when to call a pro. These affordable fixes help your home last longer and make it look better.
First, look at the problem and decide on a budget and timeline. Then, choose the right tools. With some practice, these DIY tasks will not only save you cash. They’ll also teach you handy skills and give quick, visible improvements.
Assessing Common Household Issues
Before grabbing a wrench or calling for help, check each room for signs of wear. This step lets you figure out what repairs need priority. It helps you plan for repairs that are simple, saving you time and cash.
Identify Frequent Problems
Look for common issues like leaky faucets, slow-moving drains, and faded paint. You should also check for drafty areas and underperforming appliances. Water stains, mold, and odd smells are early warning signs. Cracks or gaps around windows and doors are bad signs too.
Finding these problems early makes fixing them simpler. For example, a small water stain might mean you need a new washer. A slow drain might just need a plunger. Knowing what and where the issue is helps decide if you can fix it yourself.
Determine Severity of Repairs
It’s important to know when you can fix something or when you should call a pro. You can likely do tasks that are simple, mechanical, or just about looks by yourself. These tasks are usually simple repairs that you can try.
But watch out for big problems like ongoing leaks or large cracks. Mold spreading or gas smells mean you need a pro. For these issues, getting a plumber, electrician, or HVAC pro is safest.
Do some checks before you decide on a repair. Shut off water to see if a leak stops. Look behind and inside places with a flashlight to find moisture. A moisture meter helps find dampness you can’t see. For electric troubles, make sure power is off before you touch anything.
Budgeting for Fixes
Plan a budget covering materials, tools, and your time. Split costs into smaller parts to keep track. Using real estimates helps avoid surprise costs.
| Typical Quick Job | Materials Cost | Tool/One-Time Cost | Time Estimate | Example Brands/Stores |
|---|---|---|---|---|
| Drain unclogging | $0–$50 | $10–$30 (plunger, auger) | 15–60 minutes | Home Depot, Lowe’s, Amazon |
| Faucet washer replacement | $20–$100 | $10–$40 (basic tool set) | 30–90 minutes | Moen, Delta, Kohler parts at Ace Hardware |
| Minor drywall patch | $50–$200 | $20–$60 (sander, taping knife) | 1–4 hours (with drying time) | Home Depot, Lowe’s, USG joint compound |
Renting specialty tools can save money over buying them. Opt for tools that work for many tasks. Use brand parts like Moen or Whirlpool for the best fit and longer-lasting repairs.
Look for good deals at places like Home Depot or Amazon. Consider if fixing it yourself is worth your time. Budgeting wisely helps you handle small repairs now and bigger ones later with confidence.
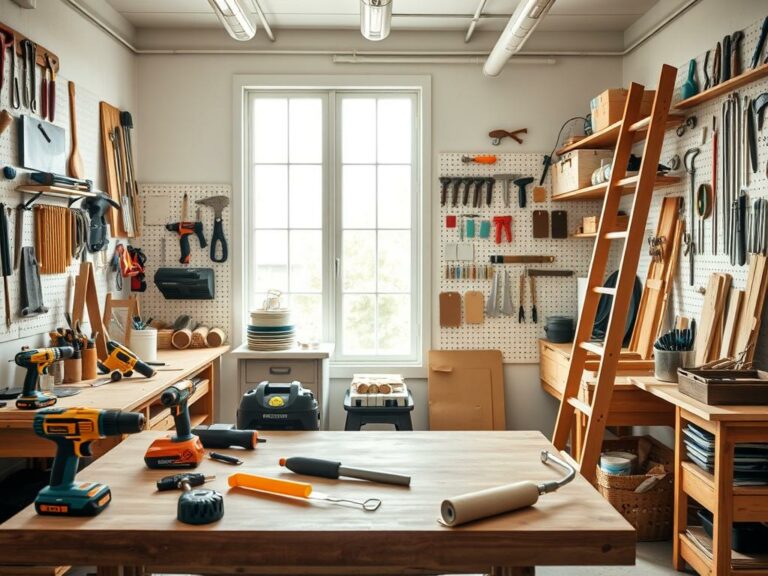
Tools You’ll Need for DIY Fixes
Before you start any job around the house, make sure you have the right tools and safety equipment. Having the right kit can make DIY projects faster and easier. Here’s a quick guide to what you should keep ready for common DIY tasks.
Essential Hand Tools
It’s good to have a core set of hand tools ready to use. An adjustable wrench is essential for plumbing fixes. Tools like slip-joint pliers and channel-lock pliers are great for gripping and turning things. You’ll use flathead and Phillips screwdrivers for most screws.
Tape measures and a level help make sure your installations are straight. A utility knife and a hammer come in handy for cutting and small demolition jobs. Use putty knives and a stud finder for patching walls and hanging items. Allen wrenches and needle-nose pliers are useful for assembly and reaching into tight spots.
Choosing reliable brands can save you time. Brands like Stanley, Craftsman, and DeWalt are known for their durable hand tools, perfect for many DIY tasks.
Power Tools to Consider
A cordless drill/driver is very useful for lots of DIY projects. Trusted brands like DeWalt, Makita, and Bosch offer reliable models and batteries that work with different tools.
An oscillating multi-tool is great for cutting grout and trim. Use a compact or full-size circular saw for simple woodwork. A random-orbit sander smooths things out for painting or staining. And, a wet/dry shop vacuum is essential for cleaning up after you’re done cutting or sanding.
If you only need a tool once in a while, consider renting bigger equipment like a tile saw instead of buying. Also, make sure the batteries match across your cordless tools.
Safety Gear for DIY Projects
Wearing the right safety gear is important for safe and comfortable work. Safety glasses protect your eyes, and gloves keep your hands safe during tough jobs. Don’t forget ear protection when using loud equipment.
Dust masks or N95 respirators are necessary for tasks that create dust. For chemical work, use a proper respirator. Knee pads are a must for comfortable floor work. Always use GFCI-protected outlets near water, and consult a professional for electrical jobs.
| Tool or Gear | Purpose | Recommended Brands |
|---|---|---|
| Adjustable Wrench | Loosen/tighten plumbing fittings | Stanley, Craftsman |
| Slip-joint & Channel-lock Pliers | Gripping, twisting, pipe work | Craftsman, Channellock |
| Screwdrivers (Flat & Phillips) | Fastener removal and installation | Stanley, DeWalt |
| Tape Measure & Level | Accurate measurements and alignment | Stanley, Stabila |
| Utility Knife & Hammer | Cutting, demolition, general repairs | Stanley, Estwing |
| Putty Knife & Stud Finder | Patching, locating studs for mounting | Hyde, Zircon |
| Allen Wrenches & Needle-nose Pliers | Assembly and tight-space work | DeWalt, Craftsman |
| Cordless Drill/Driver | Drilling, driving screws, most homeowner tasks | DeWalt, Makita, Bosch |
| Oscillating Multi-tool | Cutting grout, trim, small demolition | Fein, DeWalt |
| Circular Saw / Compact Saw | Simple carpentry and crosscuts | DeWalt, Makita |
| Random-orbit Sander | Refinishing wood and smoothing surfaces | Bosch, DeWalt |
| Wet/Dry Shop Vacuum | Cleanup of dust and debris | Shop-Vac, DeWalt |
| Safety Glasses & Ear Protection | Eye and hearing protection during tool use | 3M, DeWalt |
| Dust Masks / Respirators | Protect from particles and fumes | 3M |
| Work Gloves & Knee Pads | Hand protection and comfort for floor work | DeWalt, Milwaukee |
Simple Plumbing Fixes You Can Try
Plumbing issues are common but often don’t require a professional. With some simple tools and a bit of guidance, you can tackle many problems yourself. This article offers safe, easy steps to unclog drains, fix small leaks, and swap out faucet washers.
Unclogging Drains
Begin with a plunger. For sinks or tubs, cover the overflow and use strong plunges. If this doesn’t work, open the P-trap beneath the sink. Clear any blockages by hand, and keep gloves and a cloth nearby.
To deal with stubborn clogs, try a drain snake. Insert it slowly, twist, and remove the gunk. Opt for enzyme-based cleaners instead of harsh chemicals. They’re better for your pipes and the environment.
A mix of baking soda and vinegar can also clear drains. After pouring both down the drain, let them work for 15–30 minutes. Then, rinse with hot water. Regular maintenance, like using strainers, helps prevent clogs.
Fixing Minor Leaks
First, find where the leak is coming from. Inspect connections and fixtures for any dampness. Dry the area to see where new drips appear. If parts are loose, tighten them carefully to avoid damage.
Before reconnecting pipes, wrap them with plumber’s tape. If rubber lines are old, replace them with steel ones for a longer lifespan. To seal leaks, use silicone or plumber’s putty.
Common toilet issues often come from the flapper or fill valve. Check these parts and replace if needed. Brands like Kohler and American Standard have reliable replacement parts.
Replacing Faucet Washers
Shut off the sink’s water supply and release any pressure by opening the faucet. Use the correct tools to take off the handle and get to the valve. A bowl can hold small pieces so they don’t get lost.
Take out the old washer and identify the right replacement. Whether you have a cartridge or compression valve, brands like Oatey and Danco offer the parts you need.
After installing the new part, put the faucet back together. Turn on the water to check for leaks. Learning these repairs can save you time and money, and they’re not too hard to master.
| Task | Tools/Parts | Time | Typical Cost | When to Call a Pro |
|---|---|---|---|---|
| Unclogging a sink | Plunger, bucket, gloves, drain snake, baking soda, vinegar | 15–45 minutes | $0–$40 | Multiple clogs or sewage backup |
| Fixing minor leaks | Adjustable wrench, Teflon tape, braided supply line, silicone sealant | 20–60 minutes | $5–$60 | Hidden pipe leaks or persistent water damage |
| Replacing faucet washer | Screwdriver or Allen key, replacement washer/cartridge (Oatey or Danco) | 15–45 minutes | $3–$25 | Broken valve bodies or corroded parts |
Tackling Electrical Repairs Safely
Working on home wiring is rewarding with careful approach. Use safe practices and the right tools for effective and secure DIY home improvements. Small electrical tasks can save money when done right.
Before starting work, turn off the power and check with a voltage tester. Always wear safety glasses and have a flashlight close by. If you find old or dangerous wiring, call a professional electrician right away.
Replacing Light Fixtures
First, make sure the power is off. Take down the old fixture and check the box for damage. Make sure the wires are good and not corroded.
Next, install the fixture’s bracket, connect the wires correctly, and secure the fixture. Choose long-lasting, energy-saving LEDs for savings on bills.
If the junction box or wiring seems unsafe, it’s best to call an electrician. This avoids risk in your DIY project.
Resetting Circuit Breakers
To reset a breaker, find the one that’s not ON or OFF and flip it. If it trips again, unplug things nearby.
Overloads, short circuits, and ground faults cause trips. GFCI and AFCI breakers help avoid shocks and fires in key areas.
Constant tripping after troubleshooting means it’s time to call an electrician. They can pinpoint and fix the problem.
Installing New Outlets
Always cut power and check with a tester before handling wires. Pick the right box for your wall type. Then, prepare the wires for connection.
Connect wires to the correct terminals and use child-safe outlets. These small changes ensure safety and compliance.
Rules about codes and permits differ by location. If unsure, hiring a pro is safer than making mistakes on your own.
Keep DIY projects small and simple. With right planning and tools, many repairs are possible. But safety should always come first to protect your home and loved ones.
Drywall Repair Basics
Common drywall problems like dings and holes are easy to fix yourself. With a few tools and some patience, you can make your rooms look better. Here’s how to fix small patches, bigger repairs, and do paint touch-ups. These tips are perfect for those into DIY and simple home repairs.
Patching Small Holes
For tiny holes and dents, lightweight spackling from brands like DAP works great. You can buy it at stores like Home Depot or Lowe’s. Just spread it smoothly with a putty knife.
After applying, smooth it out and let it dry. Then, sand it gently until it’s even. Finish by priming and painting to blend with your wall. These small fixes are affordable and quick, often costing less than $20 and taking under an hour.
Fixing Larger Damages
To fix bigger holes, use a self-adhesive mesh or fiberglass tape with joint compound. For very large holes, insert a cut piece of drywall and secure it with wood cleats behind the wall.
Then, tape the edges and apply the joint compound in thin layers. Make sure to sand between coats to keep it smooth. Essential tools include different sized knives and a sanding block. Following these steps will make your repair work look seamless.
Painting Touch-Ups
Start by cleaning the area and sanding it lightly. Then, put on a layer of primer that blocks stains. It’s important to match the paint’s sheen and color for a flawless look. Use sample pots to test the color first.
For a pro look, choose top-notch brushes or rollers like those from Purdy or Wooster. Apply the paint in thin layers, allowing each to dry fully. Blending the edges and lightly rolling the surrounding area helps avoid marks. Follow the paint’s drying time instructions for the best finish on your repair project.
Flooring Fixes You Can Handle
You don’t need a pro for many flooring issues. This guide will show you how to fix scratches in hardwood, replace tiles, and reseal grout. These DIY tips can save you both time and money, and make your floors look better.

Repairing Scratches on Hardwood
First, check how deep the scratches are. For light scratches, try a stain marker from Minwax or Varathane. Always test the marker somewhere hard to see first.
If scratches are shallow, use 0000-grade steel wool to lightly buff them. Then add polish or tung oil. For big scratches, use wood filler or wax sticks, sand when dry, then stain. Finish with polyurethane to protect it.
Replacing Damaged Tiles
Start by removing grout with a grout saw around the broken tile. Then break the tile, starting from the middle.
Make sure the area underneath is clean. Spread mortar, then place a new tile, making sure it’s even. Use tile spacers for uniform gaps. Let the mortar set, then re-grout and seal. For vinyl or laminate, just unlock the piece, remove the damaged one, and insert a new plank.
Resealing Grout Lines
First, clean the grout using a cleaner or a mix of vinegar and water. Scrub well, then let it dry.
If the grout looks bad, take it out with a grout saw. Mix fresh grout and apply it. After it dries, seal with a product like Aqua Mix. This will keep stains and moisture out, making your tiles last longer.
Enhancing Curb Appeal with DIY
Small projects can greatly improve your home’s first look without costing much. Pick DIY renovations that suit your home’s style and local weather. Start with a fresh front door, lively plants, and a clean driveway. These simple changes are affordable and easy to do with a few tools and some planning.
Painting tips
First, remove or cover door hardware. Then, sand and clean the door before applying primer if needed. Choose durable exterior paint, like Benjamin Moore Aura or Sherwin-Williams Emerald. Apply two thin layers with a quality brush or roller. Let each coat dry as advised before adding another. Pick a color that enhances your home’s look and matches the siding.
Planting ideas
Choose plants that are native or attract pollinators, like black-eyed Susans and lavender. They are easy to care for and bloom for a long time. Use good potting soil for container plants and add flowers like petunias for color. Loosen the ground, mix in compost, and mulch to keep moisture. Water plants well until they’re strong. You can find affordable plants and materials at places like Lowe’s or The Home Depot.
Driveway care
For concrete driveways, use a pressure washer set between 1500–3000 psi. Pick the right nozzle and stay a safe distance to prevent damage. Treat oil spots with a degreaser before washing. You might also seal the driveway after cleaning to block future stains and damage. Always handle runoff properly to protect the environment, following your area’s rules and safety tips.
Weatherproofing Your Home
Keeping your home snug against wind and rain boosts energy savings and comfort. Follow these handy tips for maintenance. They help reduce drafts, safeguard your house, and decrease heating and cooling bills. Most homeowners can do these simple fix-ups and DIY projects.
Sealing Windows and Doors
To find drafts, move a candle flame or smoke along window and door edges. If there are leaks, seal them with outdoor-grade caulk. GE Silicone II and DAP Alex Plus create durable, weather-resistant seals.
Replace old window seals if you see water inside the panes. Adding storm windows or window film adds extra insulation. These steps can lessen heat loss, saving on energy costs.
Insulating Attics
Start by measuring your attic’s R-value. Depending on your area, you might need R-38 to R-60 in ceiling insulation. You can pick fiberglass, cellulose, or spray foam based on your budget and attic access.
For a DIY project, fiberglass and cellulose are good choices with a rented blower. Leave spray foam to the pros unless skilled; it seals air best. Always wear safety gear and ventilate the area while working.
Weatherstripping Tips
Choose weatherstripping that fits the gap size. Foam tape works for uneven spaces, V-strip suits window sashes, and door sweeps seal door bottoms well. Frost King and McMaster-Carr are reliable brands for materials.
Install the strips to slightly compress without hindering door or window movement. Correctly applied weatherstripping can reduce energy costs, block drafts, lower noise, and improve HVAC efficiency.
Painting Tips for a Fresh Look
Refreshing your walls is a top DIY renovation idea. It’s high-impact and low-cost. A smart paint job makes a room look better, protects walls, and is easy to do. You can finish it in a weekend.
Choosing the Right Paints
Use latex (water-based) paint for most of your walls. It’s easy to clean with soap and water. It has fewer toxins, which is better for indoor jobs. For trim and areas that get a lot of use, use oil-based paints. They last longer but are slower to dry.
Choose semi-gloss or satin paint for the kitchen and bathroom. These are easy to clean and resist moisture. For your living room and bedrooms, go with flat or eggshell. These hide wall flaws and create a calm vibe.
Buy paints from trusted brands like Benjamin Moore, Sherwin-Williams, or Behr. They offer consistent quality and color matching. For tougher jobs like cabinets or metal, look into specialty finishes for better durability.
Techniques for a Smooth Finish
Begin by cutting in room edges with a 2–3″ angled brush. Work on a four-foot section to avoid marks from overlapping paint. This keeps the painted edge wet.
Rollers should be high-quality and suit your wall’s texture. Load it evenly and roll off extra paint. Apply paint in thin, even layers rather than one thick layer.
For the smoothest finish, sand lightly between coats. Use fine-grit paper. Be sparing with painter’s tape and remove it when the paint is still tacky. This helps avoid peeling.
Preparing Surfaces Efficiently
Clean oily spots with a TSP alternative before painting. Fill any holes or cracks, then sand smooth. This helps the paint stick better.
If you’re painting over glossy surfaces or new drywall, apply primer first. And prime any stained areas for consistent coverage. This step is key for a professional look.
Use drop cloths to protect your floors and furniture. An extension pole will save your back on big areas. Also, use a paint tray with liners for easy cleanup. Painting in sections will help you work faster and finish among your weekend DIY projects.
Maintaining Your Home’s Appliances
Keep appliances in good condition to save money and extend their lifespan. Follow these simple home maintenance tips you can do yourself. By doing your own appliance repairs often, you save money quickly.
Cleaning Refrigerator Coils
Dirty coils make the compressor overwork, raising energy costs and reducing the fridge’s life. Unplug the fridge and move it out. Clean the coils and fan area with a vacuum brush or coil brush.
Wipe down all surfaces if needed, then push the fridge back and plug it in. Clean every 6–12 months. For parts, look at brands like Whirlpool, GE, and Frigidaire.
Descaling Your Coffee Maker
Scale buildup can ruin flavor and machine performance. Run a mix of white vinegar and water through your drip coffee maker. Then do two water-only cycles to rinse. Clean all removable parts with soap and water, then dry them.
For Keurig or Breville, use their specific descaling solutions. If you have hard water, descale monthly. With softer water, do it every three months.
Checking HVAC Filters
Filters are key for airflow and clean indoor air. They come in types like fiberglass, pleated, and HEPA. Each has MERV ratings for their filtering power. Change or clean filters every 1–3 months, depending on use, pets, and allergies.
Dusty filters cut airflow and increase power bills. Get an HVAC pro to check your system yearly. This helps spot problems early and keeps it working well.
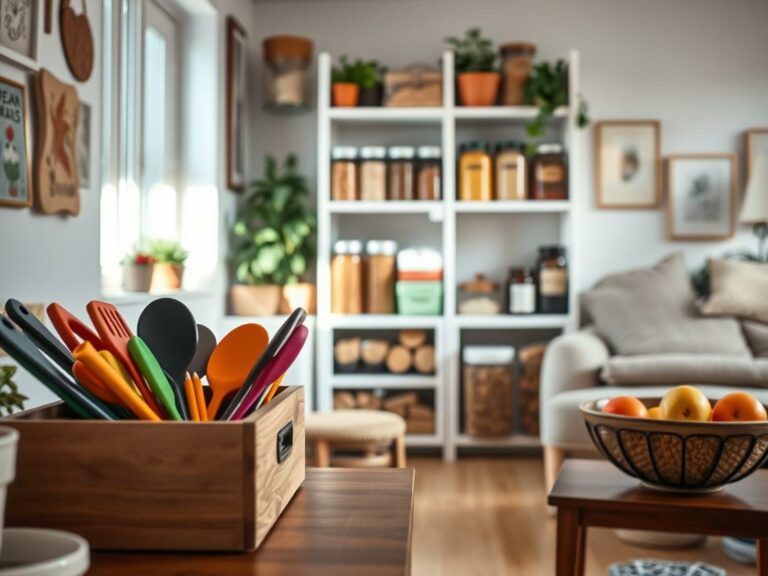
Organizing Your Living Space
Start by making a plan that suits your budget and way of living. Making small changes can help tidy up and make your home more comfy. Aim for doable steps that you can achieve over the weekend for quick results.
Utilizing Vertical Space
Put shelves up high to keep the floor tidy. Wall shelves and floating shelves save space without looking bulky.
Use pegboards for tools or kitchen stuff. It helps to see everything. Make sure shelves are secure, either in wall studs or with strong anchors.
Look at IKEA or The Container Store for shelves that you can change around. Tall bookcases can adjust as your storage needs grow.
Decluttering Tips
Create piles to keep, donate, recycle, or throw away things. If you haven’t used something in a year, you might not need it.
Declutter a little at a time, like 15–30 minutes. Doing a little bit often is easier than one big clean.
Give things you don’t need to Goodwill or sell them online. This can help pay for your home improvements.
DIY Storage Solutions
Build under-bed storage with plywood and wheels for hidden space. Or make closet organizers with brackets, rods, and simple supplies.
Turn mason jars into storage for small items. Pegboards or over-the-door organizers are easy and quick to set up.
To start, gather plywood, brackets, screws, and paint. Save by reusing old furniture or buying from Habitat for Humanity ReStore.
Final Thoughts on DIY Home Fixes
You’ve learned much from simple fixes to big plans in this guide. Use what you know to decide when to tackle a project yourself or call a pro. Smart choices keep you safe and help maintain your home’s value.
Knowing When to Call a Pro
For big jobs like major plumbing, electrical fixes, fixing the structure, HVAC or roof issues, mold, or work that needs a permit, halt and call a pro. Use Angi or HomeAdvisor to check professional licenses, insurance, and references. Always ask for written cost estimates before work starts.
Continued Learning Resources
Keep improving your skills by learning from trusted sources. Watch channels like This Old House and Home Repair Tutor. Look at guides from brands like Moen, Delta, or Whirlpool and stores like Home Depot or Lowe’s. Take community college courses and read books like the Reader’s Digest Complete Do-It-Yourself Manual. They’ll teach you about building codes and when permits are necessary.
Enjoying Your Improved Space
Feel proud of every project you finish and share the outcomes to motivate others. Small updates increase your home’s comfort and its future selling price. Regularly check on your repairs, plan future projects step by step, and let each success inspire larger DIY renovations and more home repair confidence.